If you want to strengthen your roof, you might want to install vinyl siding. The following methods are for putting it on gables and dormers.
Putting Vinyl Siding on Gables
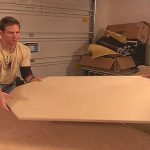
Required Tools and Materials
Hammer
Silicone caulking
Roofing paper
Nails
Staple gun
Staples (1/2”)
J channels
Chalk line
Flathead nails
Vinyl siding
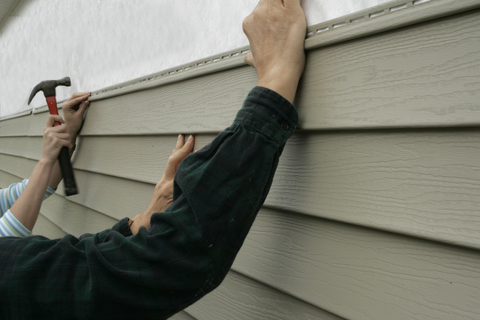
Step 1
Snap a chalk line at the bottom of the gable. This should be from one end to the other. Connect a J channel on this line. The thickness depends on how wide your vinyl siding is. Hammer in flathead nails. Or you can set it on the plywood shear panel.
Step 2
Staple the paper siding, commencing on the bottom. Make sure the first piece overlaps the J channel flange nailed on the studs. How much paper you need to install vinyl siding depends on the roof pitch. If you need more paper, overlap the 2nd on the 1st by 6”. Attach it with the staples.
Step 3
Use the silicon caulking to seal the paper by the roof’s slope sides. This should be from the gable’s bottom to the apex. Make certain you are sealing just the sides.
Step 4
Beginning at the bottom, put in the first vinyl siding piece in the J channel. Put in the next piece over the first with an inch overlap. For the top edge, use 1” roofing nails. Repeat the process until you get to the top.
Putting Vinyl Siding on Dormers
Required Tools and Materials
Vinyl siding
Tin snips
Tape measure
Hammer
J Mold, outside corner piece
Pencil
Chop saw
Level
Sliding nails
Step 1
To install vinyl siding on dormers, put the vinyl J Mold on the dormer’s angled side. This should be by the roofline at the sliding area. Put a preformed vinyl on the dormer’s front. This should be below the eave to the roofline.
Step 2
Put a vinyl piece any place on the dormer’s side. Make certain the lower inside corner touches the roof. Use the level to level it. Nail it in place.
Step 3
Place another vinyl piece on the roof slant. It should conceal the tacked piece. Hold it and draw at the mark where it passed the first vinyl piece.
Step 4
Remove the vinyl pieces. Slice along the lines using the tin snips. Put this on a vinyl piece. When you install vinyl siding, remember this will be your first piece. Illustrate another line by the angled cut.
Slice the piece and install it. You can use the nail strip over the top to fasten it. Nail it but don’t hit the nail flush. Just leave the nail 1/8” from the wall.
Step 5
Repeat the cutting and installing procedure for the other vinyl pieces. The succeeding pieces will be bigger but the angle will not change. Trim the uppermost part and put it in the J Mold.
Take care to secure yourself when you install vinyl siding on the roof. Do not attempt this if you think the roof is too steep.