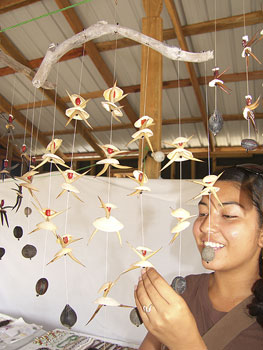
A wind chime is a nice little ornament to have around the house, beautifying and calming for its appearance and the tinkling melody that a passing wind plays on it. While they are easily available in any home décor boutique, one can also learn how to make wind chimes by themselves using a few simple materials.
The materials needed in how to make wind chimes are a pair of scissors, two 18×8-inch pieces of heavy-duty cardboard, one sheet of heavy-duty poster board, some clear string or thread, some tape, heavy duty paper puncher, a pencil, craft glue, and the items that will be used to make sound. One could use shells, keys, tubes of metal or bamboo, anything from which a pleasant sound can be produced. For painting, one can use either acrylic or enamel paint.
The first step is to make the wind chime’s top piece, beginning with drawing and cutting out two 18×8-inch triangle-shaped pieces of cardboard. Each triangle must look identical to each other. One must then pinpoint the first triangle’s center and make a slit measuring 4 inches from the straight edge to the center point. On the second cardboard triangle, a 4-inch slit is made from the center point to the straight edge.
Using the puncher, two holes 1 ½ inches apart from each other are punched across the two triangles’ bottom edges, positioned around ¾ inch over the very rim. Craft glue is applied on the edges of both 4-inch slits before fitting the two cardboard triangles together and then leaving them to dry. One may paint the pieces afterwards if they wish.
5×1 ½-inch strips of poster board are then made, each strip corresponding to a hole that had been punched on the cardboard pieces. The holes on the poster board strips should be punched approximately ¼ inch above the edges so that the strings will not pull through because of the weight of the items that will be hanging from it.
The strings to be used for making the wind chime should each have a length of about 14 inches. The number of the strings should be the same as that of the holes of the top piece that had just been completed. The strings are tied to the top piece and are then tied to the upper hole of each poster board strip. They are then strung down the second hole, after which the selected items are finally tied on.
One may opt to further beautify the items that will be hanging on the wind chime by painting them before they are tied on. Enamel paints are recommended for this to give the items a durable, polished look, or one may also use a thin coat of acrylic paint. The painting must be done in an appropriately ventilated work area, and the items should be given enough time to completely dry up before they are tied up to hang.
After all the work has been done, one has successfully learned how to make wind chimes that they can give away as neat gifts for friends and relatives, or to hang on their own doorway or windowsill. To some, a wind chime is considered a lucky charm, but others simply find their charm in the sweet musical accompaniment that they provide to a nice and breezy day.


