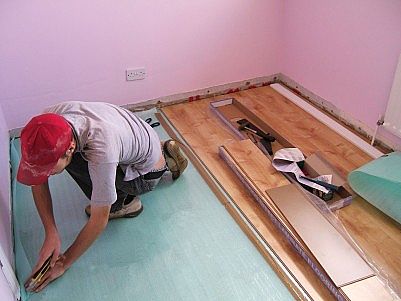
Laminate flooring is comprised of many layers of synthetic product combined together by a process referred to as lamination. Made up of fiberboard materials, melamine resin and a photographic appliqué layer, this particular type of floor is very attractive, durable and very easy to install. In order to enjoy these advantages, it is good to learn first how to install laminate floors.
Materials Needed
For this task, you need a caulking compound, a shoe molding and spacers. Additionally, you must also prepare a measuring tape, a moisture barrier as well as a rubber mallet or tapping block. Once you have gathered these items, you can start preparing for the installation process.
Steps
Start by measuring the room. The purpose of this is to determine the exact amount of laminate flooring that you need to buy for this project. It can actually prevent overspending on things that you really do not need. When measuring the area, never forget to include the areas covered by closets and cut out areas. You must include these measurements.
After determining how much laminate flooring you need, you can now buy at any local supply store. You can prevent shortage of materials by purchasing 20 percent more than what you have measured earlier. In case you commit mistakes or some of the pieces are damaged, you can replace them easily with new ones.
Take the laminate flooring out of the box and then allow it to stand for about a couple of days before you start with the installation process. This will prevent buckling and allow the flooring to acclimate to the room. Remove all furniture from the room. Take out existing shoe molding as well with the help of a crow bar.
Put a moisture barrier on top of the floor. Lay this foam-like material all over the surface of the subfloor. The foam must be pulled tightly to remove wrinkles. Avoid overlapping the foam. Start laying the boards beginning at the wall. There must be a space of about 5/16-inch between the wall and the board. For this step, you need to use either wood or plastic spacers. The groove side of the board must be arranged facing the wall. Work slowly in order not to cause damage to the board’s tongue.
At the end of every row, you may need to cut the board in order to fit inside the remaining space. For this, you need a jigsaw, a miter saw or a table saw. Begin the next row on the spot adjacent to the position where you started. Continue working until the entire floor is covered. You can cover the gap between the wall and the boards by replacing the shoe molding. Use caulking compound to fill the spaces and small cracks. Be sure to use a caulking compound that has a similar color with that of the laminate flooring.


