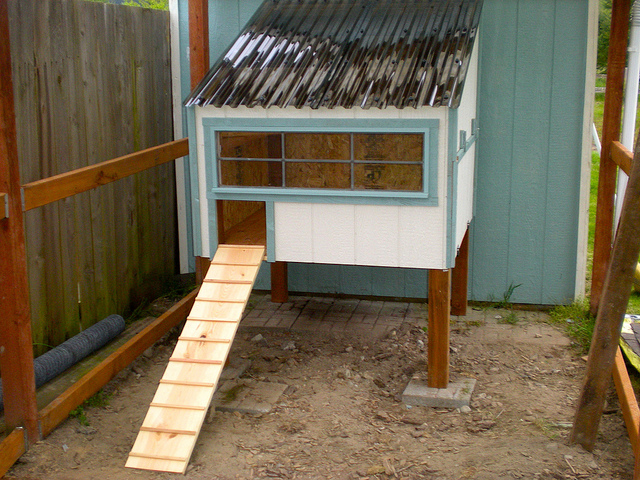
You can build a chicken coop to keep them safe from predators and also weather extremities. The coop is also the place where chickens can lay their eggs.
Required Tools and Materials
Bolt for coop door
Saw
Corrugated tin
2 12 x 8 x 2 boards
Hook and eye
2 door hinges
12 4 x 8 x 1/2 inch plywood sheets
3 bales straw
Milk crates
Post hole digger
27 2 x 4 x 12 boards
Four 4 x 4 x 8 posts
2 rolls of 1-inch hardware cloth or rat cloth
Screws and nails
Place four of the 2 x 4 x 12s where you want to put the coop. Nail them together to form the base. Nail a couple of the boards on the corners at the base’s top. Place four more of these boards along the top. You will end up with a cube shape. Nail it.
Step 2
Nail some more of the 2 x 4 x 12s. Set the intervals at 2 feet between the base boards and the top boards. Nail some of these boards over you. The interval should be 2 feet. Screw or nail a couple of plywood sheets over the roof joists. Secure the corrugated tin roof on the plywood roof.
Step 3
To make the walls, hammer nails on the plywood sheets. You should end up with only one plywood sheet. This will fit in the center of the 8 ft coop side. You will put the door here. To make windows, use the saw to make holes in the plywood. The size is up to you. Cover these holes with rat cloth as you build a chicken coop.
Step 4
Saw the 2 x 4 x 12 board into lengths measuring 2 feet. Horizontally nail the pieces on the opposing ends. This should be enough for the two 2 x 8 x 12 boards where the milk crates will be placed.
Step 5
Use the post hole digger to make a hole four feet from the coop’s front. This should be in line with the coop’s sides. Dig up a couple of holes aligned with the first. Put the posts in all the holes. Fill this with dirt. Tamp it down.
Step 5
Wrap the rat cloth on the coop. Put hinges on the door hole and add the door.
After you build a chicken coop, you can add the hook and eye. This structure ought to keep the predators away while keeping the animals in check.


