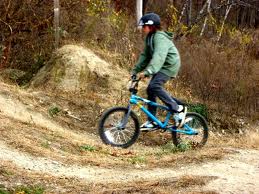
Biking enthusiasts take a lot of pride in their prized bicycles, so it is only natural that those who have learned how to build a BMX on their own have a personal attachment to their bikes. Also, being familiar with each component, they can forego taking the bike out to a shop for repairs and just fine-tune it by themselves.
For the first step in building a BMX bike, a bike fork’s 2 bottom drop outs are each placed inside an old shoe so that it will be protected while the hammering procedure is ongoing. A circular fork bearing race is placed over the bike fork’s top and allowed to fall to the base’s bottom. An old headset cup is placed on top of the fork bearing race, and is hammered so that the bearing race is pushed in place. A little bike grease is squeezed onto the tire spoke’s tip and rubbed around the bearing race at the fork’s base.
A fork bearing is placed over the fork’s top and slid down onto the bearing race. A circular vertical tube is inserted at a bike frame’s front over the fork’s top. A fork bearing is slid over the region of the fork which extends out from the bike frame. A headset’s top cap is placed on top of the fork bearing. A handlebar stem’s bolts are loosened with the use of an Allen wrench’s tip, and the stem’s front plate is pulled off. The handlebars’ bottom area is laid on top of the stem’s indented area. The front plate is placed over the handlebars, and the bolts are tightened using the Allen wrench’s tip.
The handlebars are placed onto the bike frame, the stem inserted through the bike fork’s top. The bolt remaining on the stem’s top is tightened. A seat clamp is placed over the bike frame’s middle. A seat post is inserted, and the clamp’s bolts are tightened. The micro adjuster is slid over the seat’s bottom slots and tightened over the seat post so that the seat is secured. The bike is flipped upside-down, and one fork bearing is pressed to the side of the bike frame middle’s horizontal cylinder. A bearing spacer is inserted, and another fork bearing is pushed into the opposite side.
Using the Allen wrench, a sprocket is secured to a crank arm. The middle cylinder is then slid through them. A spacer is next inserted into the middle cylinder, which is in turn inserted through the 2 bearings in the frame’s middle. Another crank arm is attached to the sprocket’s opposite side, tightening the bolts of the crank arm afterwards. The pedals are attached to the crank arms and its bolts are tightened.
The front wheel is aligned to the frame’s front. A peg each is tightened on both of the wheel’s sides so that it is secured to the bike frame. The back wheel is slid into the frame’s back. The bike chain is wrapped around the back and front sprockets, connecting the chain on the master link’s opposite ends. The back and front plates are attached onto the master link, and a peg each is tightened on both of the back wheel’s sides.


