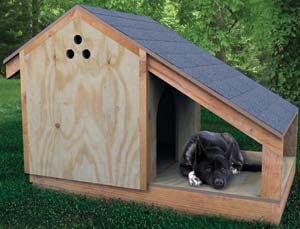
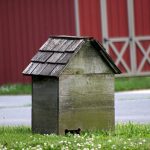
Man should never leave their best friend homeless.  Fortunately, man can easily learn how to build a dog house to give their faithful canine companion the shelter they deserve.
The materials from which one will build a dog house are a sheet of exterior grade plywood with a thickness of 4’x8’ and 5/8”, two pressure treated boards measuring 2”x4”x8’, an untreated board measuring 2”x4”x8’, a box of 1 to 5/8” galvanized deck screws, a bundle of composite roof shingles, and a tube of wet/dry roof cement. The tools to be used are a hammer, a tape measure, a table or circular saw, a drill, a pencil or pen, and a caulking gun.
Before one starts how to build a dog house, one should make certain that it will be big and comfortable enough for the dog to be able to fit and move around in, but it should be small enough to maintain their body heat. In order to insulate the house from cold weather, it would help to elevate the dog house’s floor if possible.
The first step is building the dog house’s foundation or base. Since dog houses usually sit exactly on the ground, one may want to construct the base out of pressure treated wood. However, pressure treated wood can be toxic, so they have to be closed off from the dog to prevent them from chewing on it. The base is framed out according to the desired specifications, after which it is nailed together with the use of penny nails. The sides of the foundation are drilled with 1” holes to keep the wood from rotting and so that moisture from the ground is allowed to evaporate. Small screens are placed over the holes in order to keep out birds and rodents.
In order to verify if all of the dog house’s sides match up to the roof and the foundation and are level with each other, the wood should be properly measured and cut before one starts to nail them to the base at random, cutting the walls and the roof at the same time. The side frames are then attached to the base, after which construction of the roof frame begins. Via an angle of 45 degrees, the struts and rafters are cut and then attached to the walls, completing the dog house frame.
The large plywood sheet is used to build the roof and walls of the dog house. After the plywood is attached, one can now attach shingles to the roof using either nails or wet/dry roof cement. If one opts to use mails, they have to be bent on the inside of the house so that the dog will not get scratched by them. One may want to construct a removable roof (for easy cleaning) by having one side be of a larger size than the other side, using screws to adjoin them. Wet/dry roof cement is applied to areas in the roof that appear at risk of springing a leak. In lieu of using the rafters, the roof will simply be attached to the walls. On the downside, it wouldn’t be very sturdy, so one would need to go and clean off the snow from the roof during winter.
After construction has been completed, the finishing touches in how to build a dog house are coating it with weatherproof paint in order to avoid water damage and wood rot, and placing in a carpet topped by a blanket for some padding and additional insulation. Finally, one’s beloved pet now has a nice, warm and comfortable place to call home.


