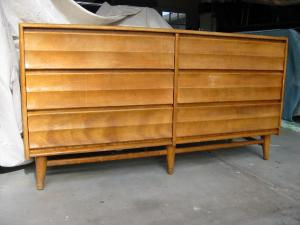
Storage can be pretty challenging, especially for homes that have piling items. Things that cannot be put to the trash due to their sentimental value but are no longer applicable for everyday use must be put away neatly in a nice storage. For that, a dresser could be the best solution.
A dresser with a number of drawers can help you organize your closet effectively. They can be acquired from home stores but they do come with a price. Some dressers come in a do-it-yourself package. Unlike the fully constructed one, DIY dressers are packed with all the bits in a box complete with instructions and guides on how to install. If you do not have the budget to buy a new dresser for your bedroom, don’t worry. There is a less expensive, DIY way of acquiring a new dresser. You can build your own dresser with a helpful guide.
How to Build a Dresser
There are many different styles of dressers to choose from. Before learning how to build a dresser, you must first decide what kind you want, need, and like. How many drawers you want to have? Do you want a mirror in it? Those questions must be answered before gathering the materials you will need for the project.
Look through home catalogs for inspiration. There are dresser designs that you can imitate from those free magazines that are also readily available online.
Next up, you must gather the materials you will need for the project. You must buy pieces of wood and sheets of plywood for the task. You will also need tools such as a measuring equipment, saw, hammer, nails, sand paper, and paint or wood stain for a sparkling finish.
Take the necessary measurement. You need to make sure that even with the dresser around, you will still have enough legroom in your bedroom space. If you are looking to build a five drawer dresser, you will need to make five sets of the material, plus the side panels including that for the top, the bottom, and the back.
After taking the measurements, it is time to cut the wood. Make sure that your cut is accurate. Any mistake could be costly so be careful.
Now it is time to put the pieces together. Use nails and adhesive glue to attach each bit to another. Secure the wood and fasten the boards together.
Lastly, give your dresser an exciting finish by painting it in your favorite color or in any color that will complement the current theme in your room. You may also use wood stain to make your dresser look even more attractive.


