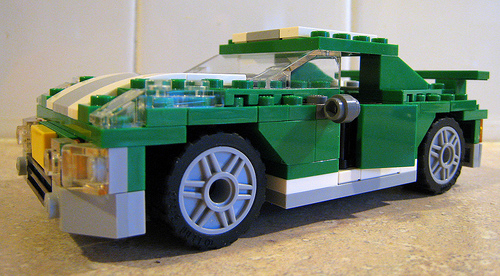
The fascinating thing about Lego is that it’s virtually piecing together a 3-dimensional puzzle. It seems like such a painstaking and intricate hobby, and yet, if one thinks about it, it’s actually pretty simple. It’s just a matter of connecting blocks and strips. With a little imagination and a bit of perseverance, practically anything can be built out of Lego; even a working toy car.
Let’s start with building a very easy, basic Lego car. Before beginning construction, gather up all the pieces that will be needed; namely, two wheel mount blocks, a 6”x2” dot rectangle block, three 2”x2” dot blocks, a 2 dot angle block, four rubber tires, and four tire centers.
The first step in the assembly is to attach the dot rectangle block onto the wheel mounts, with each mount positioned on opposite ends below the rectangle. Then, two of the 2”x2” dot blocks are attached on top of the rectangle, again on opposite ends. Next, the 2 dot angle block is placed at the front while the last 2”x2” dot block is attached to the back. Finally, the tire centers are inserted into the tires and are snapped onto the wheel mounts.
After learning how to build a very basic Lego car, one may want to move up to building one that’s a little more elaborate. To begin, take two sets of wheels, one with small wheels and another with larger ones. It is preferable that the wheels to be used have good traction. Hubcap pieces are then attached to the back wheels (the larger set of wheels), and an additional piece is attached to the back wheels’ underside so as to represent a tailpipe.
2 or more long rectangular Lego strips are then attached to the 2 wheel bases, each set of wheels on opposite sides. The rectangle strips should measure a width of 2 studs and a length of up to 9 studs. Continue assembly of the Lego car’s main chassis using strips of various colors to give it an interesting look. Then take a small black piece which measures 2 studs wide x 1 stud long and attach it to the car’s front. Attach a round transparent piece on each of the black piece’s studs, followed by a transparent strip placed over them. These pieces will serve as the car’s headlights.
Get a larger Lego strip that slightly tapers down at the front, measures a width of 4 studs at its back, and is about as long as the remainder of the Lego car. This strip is then turned over and on its underside is attached 2 small pieces, onto which wings will later be attached. Construction on the chassis continues using diversely-colored smaller pieces.
For building the rear, look for pieces that have rounded edges to provide the Lego car with a unique look. The wings are then attached to the pieces on the tapered strip’s underside. Attach a couple of striped pieces on top of the car for decoration. To make the doors, just attach 2 slim Lego pieces on the sides of the car. Place an engine block on the car’s front, a spoiler on its rear, and top it with a transparent wind-shield. For the finishing touch, attach 2 sloped triangular pieces on the front, and a good-looking, ready-to-roll Lego car has finally been completed.


