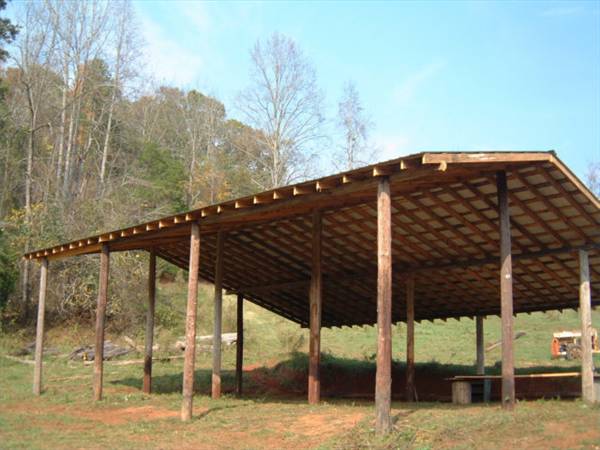
Pole barns are common features in farms, as they can serve a variety of purposes and are easy to set up. The proceeding instructions will show you how to build a pole barn.
Required Tools and Materials
Poles
Shovel
Roof trusses
Straight nails
Stakes
Roofing nails
Concrete or gravel
Hammer
Tin roofing sections
Saw
Caulking gun
Several storm clips
Braces
Lumber (8 ft long; 2 x 4s and 2 x 6s)
Step 1
Find a suitable location. Two things are necessary; the surface must be flat and the site doesn’t retain water. If it does, you’ll need to set up a drainage system which can be time consuming.
Step 2
Draw a sketch of the barn and refer to it as you build. If necessary, cut the lumber into 8 ft long sections. For the frames, use the 2 x 4s. For the roof stringers, use the 2 x 6 boards. To build a pole barn’s wall, cut the plywood to your preferred size. The corrugated tin will be for the roof.
Step 3
Dig holes for the posts. Space the holes according to the dimensions of your barn. Make sure the corners are set to 90 degrees. Put the stake in the hole’s center. Pour concrete in the hole. Try to pour the concrete in the loose soil. Add six inches of gravel. Pack the gravel in.
Step 4
Put the posts in the holes. Brace the poles until the poles are secured. Make sure the structures are upright.
Step 5
Fasten the stringers on the poles’ tops. When you build a pole barn, the stringers need to be secured tight. They need to be firm because it will carry the trusses and the roof.
Step 6
Install the roof trusses using the braces (you can also utilize a rope). To add additional trusses, just brace them against the one you have installed. Next, add the purlins. These are the 2 x 4s used to support the trusses. Fasten them on the stringers’ outer edge.
Step 7
Use the roofing nails to fasten the tin roof on. When installing, overlap the short roofing sections. Overlapping will make the roof more resistant to weather changes. Use a caulking gun on these overlapping parts. As you build a pole barn roof, install the tin ridge cap on top of it.
Step 8
If your plans include walls, install them now. You can use the 2 x4s as brace for the plywood walls.
Tips and Warnings
You can add the storm clips to the barn. This is optional, but it will fortify the barn. Double check your measurements; a single misalignment may cause the entire structure to collapse. Get some help from your friends if you think you can’t complete the project by yourself. Wear eye goggles and gloves when using these tools.
The most important thing to remember when you build a pole barn is its strength. By making sure it is fortified, the structure will be able to meet your needs adequately.


