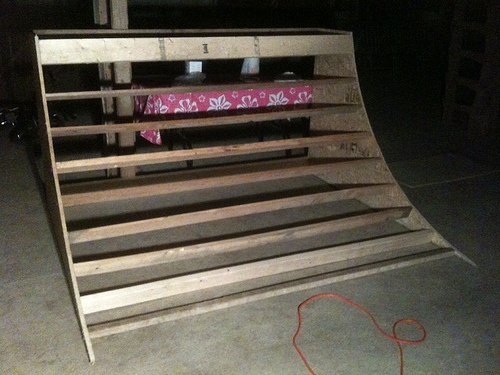
One of the ways to hone your skateboard skills is by practicing on the quarter pipe. It is also easier to build a quarter pipe than the halfpipe and takes up less space.
Required Tools and Materials
Pencil
Power saw
Hammer
Bracing
Nails
Wood screws 1 1/2 inches
Several sheets of plywood, 1/4 and 1/2 inch
8 2-by-4 pieces of wood
Cut the 1/2-inch plywood pieces and use it as the curve or transition of the pipe. Make sure that the curve is smooth. You should also add a vert. The vert is the point where the transition changes to a straight vertical line. This feature makes the ramp more challenging.
Step 2
Line up a couple of 2 x 4s vertically and horizontally along the bottom and back of each plywood. Begin where the transition is thick enough to conceal the 2 x 4s.
This is about ten inches from the curve’s point. Measure and cut vertical pieces two feet apart. Cut these so they are flushed on the transition. Nail them on the sides of the ramp.
Step 3
To build a quarter pipe, you have to cut a few more 2 x 4s set to the width of the ramp. Make sure to account for the three inches for the 2 x 4 brace. Join these on the ramp’s bottom and top braces. Connect the 2 x 4s on the braces’ tops. Set the alignment so the pieces are perpendicular to the ramp’s curve.
Step 4
Create the skeleton for the platform and join it to the quarter pipe’s back. Make a wall using the 2 x 4s for the back, side and the top. Be certain it is durable enough to carry several skaters.
Step 5
Dip the 1/4-inch plywood sheets in water. You can use a garden hose if you like. Place it over the ramp. Note where the cross braces are located. Push the wood into the curve. Fasten it with a screwdriver. Begin at the bottom and work all the way up. Remove any excesses.
Step 6
Put another 1/4-inch plywood sheet on. Repeat the process. Mark the brace lines again if needed.
Step 7
Cut a half inch plywood sheet with the dimensions of your skate platform. Fasten this to the ramp.
The final step to build a quarter pipe is to paint the structure. Apply the coating evenly. The paint will not just make the ramp look more attractive. It will also protect it from wear and tear.


