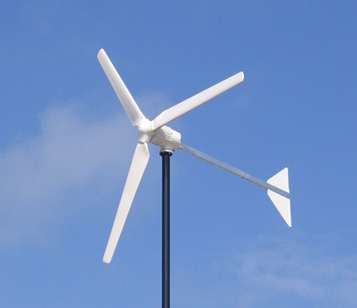
Knowing how to build a wind generator is one of the easiest ways to reduce power expenses. As you’ll see, the procedure can be quite straightforward. You simply need the right tools.
Required Tools and Materials
Socket set
Saw
Automotive fan belt
Wheel hub with bearings
Lumber (several pieces of 2 x 4s and plywood)
Hammer
Battery bank
Belt pulleys
Drill
Nails
Bolts
L brackets
Automotive alternator
Screwdrivers
Sander
Step 1
Determine the size of the wind generator. Next, cut the wood boards and make the vanes. Slice them according to the specified dimensions. The edges should be sanded to a 30 degree angle.
The wood curves will be the fan blades. When you build a wind generator, these will be the parts that will rotate. The longer they are, the greater the wind friction, so long curves are recommended.
Step 2
Set the vanes on a wheel bearing plate (i.e., the wheel hub). Fasten the vanes to the wheel hub using bolts and L brackets. If the wheel hubs have bolts installed, you can utilize these. Secure them tight.
Step 3
Get the automated belt pulley and connect them to the wheel hub. Alternatively, use a belt that can fit in the hub’s groove. Be certain the pulley is firmly fastened because it will be used to move the alternator. When you build a wind generator, the pulley will provide power, hence the need for its firmness.
Step 4
Put the vanes and the wheel bearing on a platform or tower. The structure should be high enough so strong winds can reach it. Connect the rear hub to the platform / tower. Don’t bolt the front parts so the vanes can spin.
Step 5
Put the automotive alternator under the hub. Secure it to the supporting structure using the bolts. Make sure the pulley and hub pulley are at the same angle. Ensure that the drive belt can be installed with adequate tension.
As you build a wind generator, ensure the mount is solid. Also keep in mind the alternator will be subject to wear and tear. It’s a good idea to use automotive engine parts like metal alternative mounts.
Step 6
Connect the hub belt between the alternator and hub pulleys. You can do this by slipping the belt on each pulley groove. Position the belt so it can rotate the alternator as the vanes move.
Step 7
Link the alternator’s power source to a battery bank. Done correctly, the generator should work.
Tips
The location is critical. Choose the one that generates the greatest amount of wind at the height you intend to make the generator. To avoid difficulties, you should prepare the various components early.
Bring a handful of bolts and brackets. Make sure none of the pulleys or other parts are worn out. Check all the bolts so parts don’t fly off.
The time it takes to build a wind generator is usually a day. For this to work, the wind needs to blow around 15 mph.


