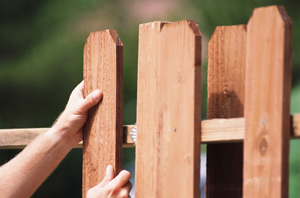
Picket fences may look nice in the front yard, but they can  be a hassle to maintain, prone as they are to wood rot and water damage. It is then important to learn how to fix a picket fence in order to fortify it and preserve its look.
The first step in how to fix a picket fence is to replace the damaged picket(s). This is done by first hammering on the picket to be replaced on the side that is opposite to the nails in order to loosen it. The picket is then removed with the use of the hammer and a crowbar. The hammer’s claw end is utilized to remove any remaining nails on the rail. A new picket is made of the same length and style as the old one by tracing an outline of the removed picket on a new wooden board and cutting out the shape using an electric jigsaw. The newly-made picket is attached to the rails using two galvanized nails and painted to match the color of the rest of the fence.
To reinforce a picket fence’s rail, one should first chip away traces of wood rot along the rail’s end. A 2×4 piece of lumber is then cut to fashion a wooden block with a length proportional to the fence post’s width, generally around 3 ½” or 9 cm. The block is nailed to the fence post, underneath the rail, with two galvanized nails. The rail is nailed to block, and they are then both painted.
If a picket fence post has rotted from underground, it can be fixed without having to take out the whole post (and perhaps a significant portion of the fence along with it) by cutting through the post some 2” or 5 cm above ground. One must then dig around the post’s foundation; if the post is enclosed by concrete, employ a hammer or a sledgehammer to break it up. The post’s underground section is then removed. To make the hole straight-sided, dig around its edges to give it a width of around 1’ or 30 cm and a center measuring 2-3” or 5-7 cm from the old post’s side. A 4” or 10 cm layer of gravel is poured into the hole, after which the new hole’s depth is measured.
A piece of 4×4 pressure-treated lumber is cut at a length two times the depth of the hole. The top part of the new post is cut at an angle of 45 degrees so that water can run off it once it has been installed. This “sister” post is placed into the hole, facing its longest side to the old post. Two ½” or 12 mm holes roughly 1’ or 30 cm apart from each other are drilled through both new and old posts. A lag bolt is inserted into each of the holes, and a nut and washer unit is fastened to the opposite end. Finally, the hole is filled with concrete just some inches above ground level; using a trowel, the concrete is smoothed so that it slightly slants down clear of the post.
In sustaining the overall appearance of one’s house, knowing how to fix a picket fence cannot be discounted. If one’s home is their castle, its fence should be its sparkling gate; a splendid façade that keeps one’s abode looking pleasant and ever inviting.


