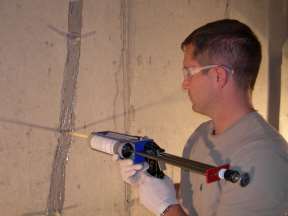
Leaking is one of the most problematic situations that  people encounter in their basements. This messy problem often leads to the presence of a pool of water inside their homes, which is not a good thing as it causes mildew and mold to develop. This situation is often associated with cracking, which commonly begins at the foundation and moves towards the upper portions of the house. These problems can be solved more easily by knowing how to fix basement leaks.
Materials Needed
A moderately difficult task that requires a number of different materials, you need to prepare items such as a garden hose, sandpaper and trowel to make things easier. Aside from these, you have to bring a sprayer nozzle, a stiff brush and sand. Other necessary materials included in this task are waterproofing compound, a sandblaster and cement. Do not forget to prepare a bucket, which can be used to prepare the patching mixture for the leaks and cracks.
Steps
Before working on the cracks and leaks, you first need to smoothen out the inner surfaces of the basement using sandpaper. The reason for this is to take out the paint and other debris found on the walls, which can prevent the waterproofing compound and patching material to function properly. The paint actually impedes these materials from connecting directly to the surface of the walls.
Look at the walls meticulously and then look for every crack or hole. Be sure to make every one so as not to leave out anything. Get the bucket and then combine 2-parts sand and a 1-part cement. Add water gently before mixing it well. Wait until the mortar achieves a consistency that is similar to stiff paste.
On each hole, put a single thin coat of the mixture. For this, you must use the trowel to fill up each crack or hole. Once a crack is filled up with the mixture, try to put approximately 2 inches more of it in order to seal the problem completely. Leave the mortar to dry for at least a day or two.
Equip the garden hose with a sprayer nozzle and then use it to moisten the walls. It is important to keep the walls damp but without dripping water. Get a nice clean bucket or container and then prepare the waterproofing mixture. Directions are usually indicated in the packaging. Be sure to follow them carefully. Mix until a slightly thick slurry consistency is achieved.
Look for parts with signs of leakage and then apply the mixture using a circular motion. Try to start at the bottom part and then slowly work your way to the top. Once the mixture dries up, use the garden hose once again to make the walls damp. Remember, there must be no dripping water on the walls before proceeding to the next step. Apply another thin coat of the waterproofing element. Leave the walls overnight.


