The garage is more convenient and easier to use when it has a highly efficient door opener. However, after a long time of use, this important device eventually breaks and fails to function properly. Although it is quite simple, this device may take some time and tremendous effort to put up, especially if you lack the appropriate knowledge and equipment to perform it. Enjoy the comforts provided by this device by knowing how to install a garage door opener.
Materials Needed
The primary materials needed to accomplish this simple task include a screwdriver and an open-end wrench. To reach the elevated parts of your garage, be sure to have a 7-foot stepladder for climbing purposes. Of course, do not forget to buy and bring in a heavy-duty garage door opener.
Steps
If the old garage door opener is not functioning properly anymore, replace it right away as well as all of its major components. This means replacing the wiring, remotes as well as the old switches. If the wires are found right on top of the drywall, you may not want to replace them because this means additional work for you.
A garage door opener usually comes with an exterior mounted switch, a couple of remotes and a wall switch. The exterior switch features buttons, which are used to close and open the door by entering a private code.
Just like most electronic devices, a set of garage door opener comes with a user’s manual. Be sure to read all the important details written there including the warnings as well as the step-by-step instructions. You can save a lot of time by doing this. Follow these things carefully and then assemble the track based on the instructions provided.
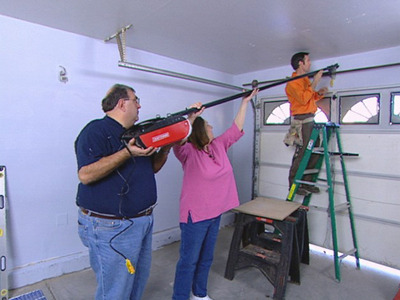
Next important thing to do is to install the door opener right on the garage’s ceiling. You can easily reach this part with the help of the 7-foot stepladder. It is good to put a rubber mechanism at the middle of the drywall and the mounting hardware. The main purpose behind this is to reduce the vibration significantly. After that, connect the door header to the opener’s door end. Use lag bolts for this all-important step.
Do not forget to install the belt or the chain. When all the appropriate parts are set, install all the important wirings based on the instructions provided in the manual. In case you have some trouble with this part, you can always seek the help of an electrician. This is easy to follow as long as you follow the instructions carefully. Install the exterior switch and then connect the small wire.
Install the two electronic sensors at the bottom part of the garage door. You can find this spot right next to the garage door track. Fill each remote with the right batteries. Plug the garage door opening into the outlet. Check if it is working properly. Do this a number of times.


