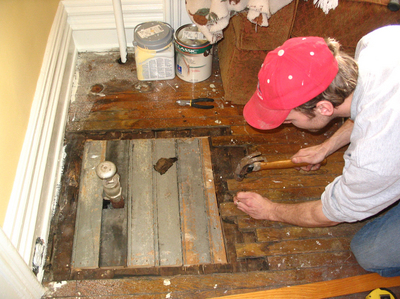
Patching a hardwood floor involves careful work since you want to make the patched material to look just like the old wood previously installed. Sometimes you have to do this whenever you had to repair entryways or you just had to replace strips of damaged wood. The main idea here is that you should make the newly repaired surface look like, blend with, and match the original one. We’ll give you some tips on how to this below.
Required Equipment and Materials
Here are the items you need in patching a hardwood floor: Hammer, miter saw, common nail, circular saw, combination square, epoxy, chisel, measuring tape, razor knife, and your hardwood flooring replacement.
Get Rid of Damaged Planks
Patching a hardwood floor will require you to get rid of any damaged planks present. First step is for you to draw a line at the very middle of the planks that you want to remove. Using a circular saw, set the required blade depth necessary to go through the flooring. Be very careful as you lower the saw onto the flooring. Push it slowly moving forward going along the board’s center.
Use your utility knife and a straight edge to make out the end cuts. Once you have you have made your score cuts grab a chisel and cut right through this line. Be sure to slice through the line and the entire plank. Once you’re done with the end cuts your board should be cut at the very middle. After this you should be able to pry out the board with little effort. Take note that as soon as you remove at least one piece the rest of the pieces just follow suit without any hassle.
Sand Your Floor Surface
The next concern in patching a hardwood floor is to sand the surface where you removed the planks. You can use a belt sander for this job if you have one.
Replace the Boards
Using a miter saw, cut the replacement boards into the proper size to fit the area where you took out the damaged plank. You can use the piece you removed from the floor to check whether you shaped the pieces perfectly. Once you’re done shaping the replacement insert them into the section of the floor that was removed. Give the replacement boards a few taps to check if ever they fit in smugly in the hole you cut out.
Replace the Old Finish
This is the tricky part when patching a hardwood floor. You can use a paint scraper to remove the old finish. You may even have to extend to the adjacent boards if warranted to make things look closely similar. If you have time you should scrape off the finish of an entire plank just to make things look right.
Before you apply any new finish to your board fill any nail holes that are exposed. Sand off any rough surfaces and remove any dust before applying the new finish. Once everything is smoothened out apply the new finish on the repaired planks. The last step to patching a hardwood floor is to apply a toning coat to match the new finish with the rest of the hardwood floor.


